Srt14292
Est; 1992
- Messages
- 1,294
- Location
- London, UK
Well I don't believe there is a thread on this already, so here it is.
My way to breed your own waxworms.
Be warned the home bred waxworms can get up to over an inch in length, and are ALOT faster then shop bought.
1. Basically what you will need is:
- A jar (Plastic, tall if possible remember you are housing moths however its not mega important.)
- Bodywork mesh (if you are English you can get this at halfords, Americans I think home depo or your equivalent of a B&Q might do it, it must be small hole'd mesh.
- Culture medium (see next section)
- Corrugated card
- A tub of waxworms (approx 20 - 30).
2. Culture medium:
This is one of the most important sections, many people get this wrong and it is why their cultures fail.
You will need,
- Some wheatabix, or wheat germ if you have it. Cheap supermarket brands are ok the waxworms are not going to notice.

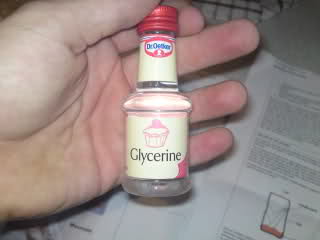
- Glycerine ( It is used in cake mixes can be picked up from local store, this is optional)
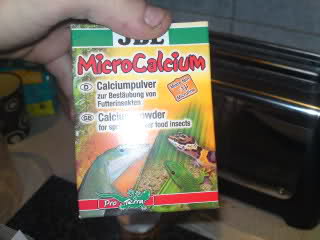
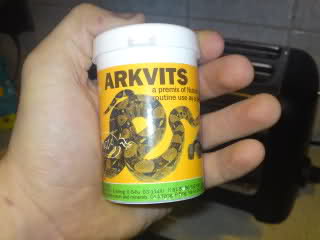
- Calcium and vitamins (they are optional but I like to use them)
- Honey

...To make the medium I crush a load of the Wheatabix into a tub (the ammount depends on the size of your tub, bare in mind you can always make more.
...Once this is crushed and it resembles wheat germ, add some of the calcium and vitamins if you are using it. Only 2 or 3 large pinches each, again depends on the size of your tub and medium mixture.
...Add a few drops of Glycerine if you are using it.
... Now you need to warm the honey up, I tend to put this in a pot over a glass of boiled water so it turns really runny.

...Add this bit by bit to your mixture while turning it over untill you get the required consistancy, the consistancy you are looking for is like when you prepare vermiculite, needs to stick together when squeezed in hand, but easily crumbles.
...Once this is done it can be stored in the fridge for later use, or use it all at once.
3. Now what you want to do is layer your tub with around 2-3 inches of the medium.
4. This is where your corrugated cardboard comes in, this takes time but find a couple of peices, you need to take away one side so you are left with one flat side, and the other side is the bumpy ledge like side.
This takes time but get the peices so they can stand veritcally in your tub, with the ridges running horizontally.
5. once you have added the cardboard its time to set to work with the mesh, cut a sizeable hole into the top of your plastic lid, this is where the mesh is going to go, stick it underneath the top of the lid with superglue etc, make sure it covers the whole of the hole. Make sure you can still fit your lid onto the tub.
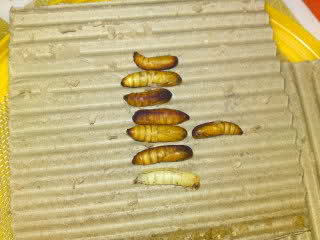
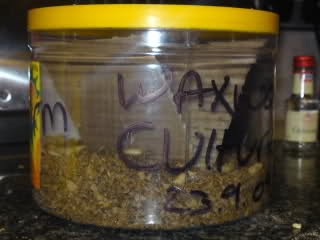
6. Now the hard part is over! Believe it or not, Just add 20 - 30 waxworms and wait.
Heres a picture of a fresh batch I made today.
7. You now just need to wait around 8 weeks for the moths to emerge, lay the eggs on the cardboard and die off, once ALL moths have died, remove them from the tub, do not try it while you still have live ones in there, unless you want them escaping.
Rough time line :
Start: Waxworms added
Week 2-3 : Waxmoths emerge
Week 4-6: Medium teaming with small to medium waxworms
Week 8 onwards: The waxworms will be getting BIG now, its ready to harvest whenever you want.
This is only a rough timeline it was in dark warm conditions.
MAINTENANCE: there is no real maintenance needed, just check up often to find there is not a load of moisture as this will kill them.
As usual they can be kept in the fridge to prolong their lives. Again bare in mind when harvesting, these are alot faster then shop bought worms.
When you have made the culture, after a few times you will get to know a recipe for yourself and you can tweak it.
Once you harvest them just pack up in tubs with some shavings and leave to pupate if not already.
ENJOY.
My way to breed your own waxworms.
Be warned the home bred waxworms can get up to over an inch in length, and are ALOT faster then shop bought.
1. Basically what you will need is:
- A jar (Plastic, tall if possible remember you are housing moths however its not mega important.)
- Bodywork mesh (if you are English you can get this at halfords, Americans I think home depo or your equivalent of a B&Q might do it, it must be small hole'd mesh.
- Culture medium (see next section)
- Corrugated card
- A tub of waxworms (approx 20 - 30).
2. Culture medium:
This is one of the most important sections, many people get this wrong and it is why their cultures fail.
You will need,
- Some wheatabix, or wheat germ if you have it. Cheap supermarket brands are ok the waxworms are not going to notice.
- Glycerine ( It is used in cake mixes can be picked up from local store, this is optional)
- Calcium and vitamins (they are optional but I like to use them)
- Honey
...To make the medium I crush a load of the Wheatabix into a tub (the ammount depends on the size of your tub, bare in mind you can always make more.
...Once this is crushed and it resembles wheat germ, add some of the calcium and vitamins if you are using it. Only 2 or 3 large pinches each, again depends on the size of your tub and medium mixture.
...Add a few drops of Glycerine if you are using it.
... Now you need to warm the honey up, I tend to put this in a pot over a glass of boiled water so it turns really runny.
...Add this bit by bit to your mixture while turning it over untill you get the required consistancy, the consistancy you are looking for is like when you prepare vermiculite, needs to stick together when squeezed in hand, but easily crumbles.
...Once this is done it can be stored in the fridge for later use, or use it all at once.
3. Now what you want to do is layer your tub with around 2-3 inches of the medium.
4. This is where your corrugated cardboard comes in, this takes time but find a couple of peices, you need to take away one side so you are left with one flat side, and the other side is the bumpy ledge like side.
This takes time but get the peices so they can stand veritcally in your tub, with the ridges running horizontally.
5. once you have added the cardboard its time to set to work with the mesh, cut a sizeable hole into the top of your plastic lid, this is where the mesh is going to go, stick it underneath the top of the lid with superglue etc, make sure it covers the whole of the hole. Make sure you can still fit your lid onto the tub.
6. Now the hard part is over! Believe it or not, Just add 20 - 30 waxworms and wait.
Heres a picture of a fresh batch I made today.
7. You now just need to wait around 8 weeks for the moths to emerge, lay the eggs on the cardboard and die off, once ALL moths have died, remove them from the tub, do not try it while you still have live ones in there, unless you want them escaping.
Rough time line :
Start: Waxworms added
Week 2-3 : Waxmoths emerge
Week 4-6: Medium teaming with small to medium waxworms
Week 8 onwards: The waxworms will be getting BIG now, its ready to harvest whenever you want.
This is only a rough timeline it was in dark warm conditions.
MAINTENANCE: there is no real maintenance needed, just check up often to find there is not a load of moisture as this will kill them.
As usual they can be kept in the fridge to prolong their lives. Again bare in mind when harvesting, these are alot faster then shop bought worms.
When you have made the culture, after a few times you will get to know a recipe for yourself and you can tweak it.
Once you harvest them just pack up in tubs with some shavings and leave to pupate if not already.
ENJOY.
")