First DIY Project

Lavodnas

New Member
Messages
164
Location
San Antonio
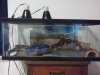
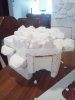
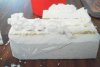
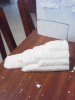
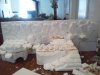
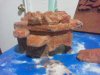
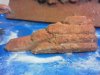
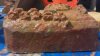
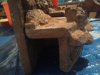
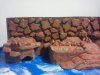
Finally finished my DIY hides and background. Currently waiting for the sealant to completely cure before I give Sparks a nice little upgrade. I didn't take pics of the whole process but at least you'll get an idea of the before/after. I made everything in single pieces for ease of removal and cleaning. Let me know what you think.
 

Attachments

  • Current setup.jpg
    Current setup.jpg
    17.3 KB · Views: 81
  • Sparks In His Favorite Hangout.jpg
    Sparks In His Favorite Hangout.jpg
    18.8 KB · Views: 82
  • New Hide.jpg
    New Hide.jpg
    16.7 KB · Views: 84
  • Moist Hide Cover.jpg
    Moist Hide Cover.jpg
    15.7 KB · Views: 77
  • Moist Hide Steps.jpg
    Moist Hide Steps.jpg
    17.1 KB · Views: 77
  • All Together.jpg
    All Together.jpg
    21 KB · Views: 82

Lavodnas

New Member
Messages
164
Location
San Antonio
After some work...

This is after applying grout, painting it a little, and sealing everything.
 

Attachments

  • New Hide 2.jpg
    New Hide 2.jpg
    27.5 KB · Views: 71
  • Moist Hide Steps 2.jpg
    Moist Hide Steps 2.jpg
    28.3 KB · Views: 70
  • Moist Hide Cover 2.jpg
    Moist Hide Cover 2.jpg
    21.9 KB · Views: 72
  • Hide Window.jpg
    Hide Window.jpg
    25.2 KB · Views: 71
  • Background.jpg
    Background.jpg
    17 KB · Views: 69
  • All Together 2.jpg
    All Together 2.jpg
    28.4 KB · Views: 78

Lavodnas

New Member
Messages
164
Location
San Antonio
Thanks for the positive reactions.

Cesar, I used TileLab Tile & Grout Sealer. It may look glossy in the pics, but dried nicely and didn't leave a shine like I've seen happen with Modge Podge.
 

Visit our friends

Top